Telescopic Orthotic
- Oct 18, 2020
- 2 min read
Updated: Apr 24, 2023
Location: Cambridge, MA
Date: Spring 2019
Read more about the experience here:
To explore the intersection between international development and mechanical design, I enrolled in D-Lab Design. Working 4 other incredibly inspiring women, I prototyped a 3D-printed telescopic orthotic for kids with cerebral palsy. My work was to push the team forward, communicate with our host company Prothesia, and collaborate in the human-centered design ideation/validation/prototyping phases.
ideation | prototyping | low-cost technology | 3D-printing | Spanish
Timeline: 3.5 months
What I Learned:
Converging on a clear scope & timeline at the beginning of a project.
Candid conversation regarding bandwidth of team members around delegated tasks.
The importance of asking questions & advice from mentors around component trade-off, mechanical analysis, and team dynamics.
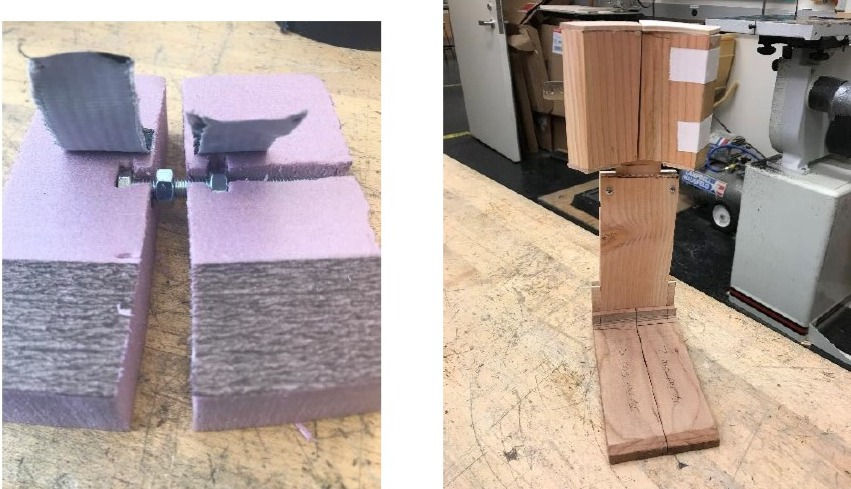
Shop skills: 3D-printing, wood & foam prototypes, bandsaw, CAD

Our challenge was to adapt the growing foot of the child by creating an adaptable sizable orthotic. This would significantly reduce the amount of money each family would have to invest in orthotics for their children, because they would only have to buy an orthotic every 3-4 years instead of every year.
Because as mentioned before, our main challenge as a team was addressing how to make an object that was custom-fit for a child adaptable to their growth, we thought about many different angles.
Can we change the material to be elastic in some way?
Extenders attached to back or front of the orthotic?
Extenders inside the orthotic?
Would different shapes faciliate & optimize the extension?
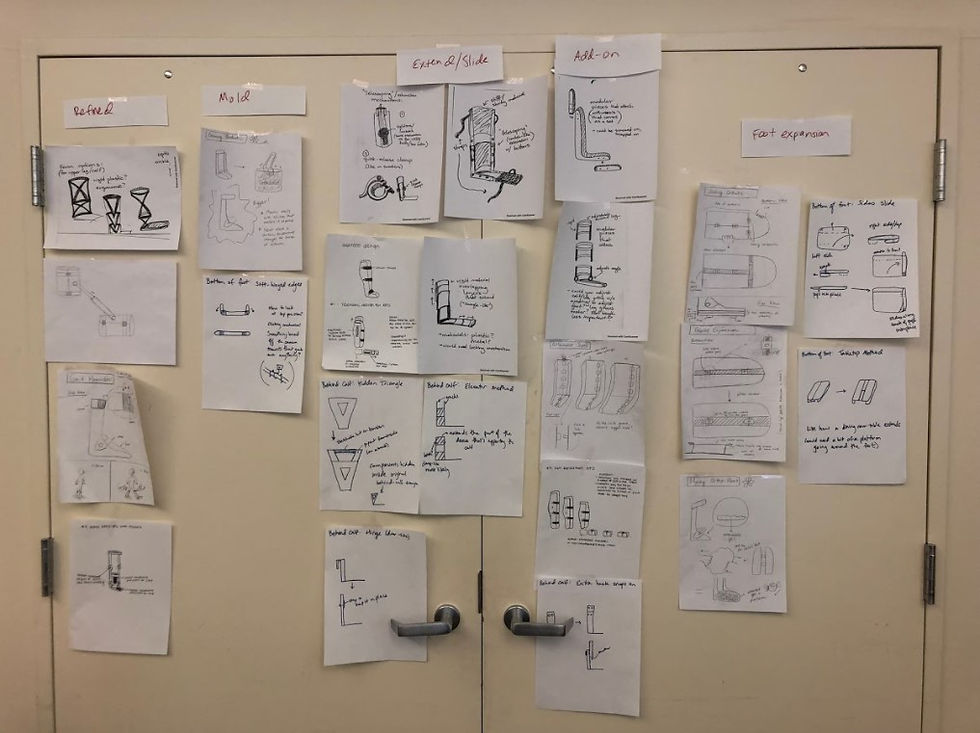
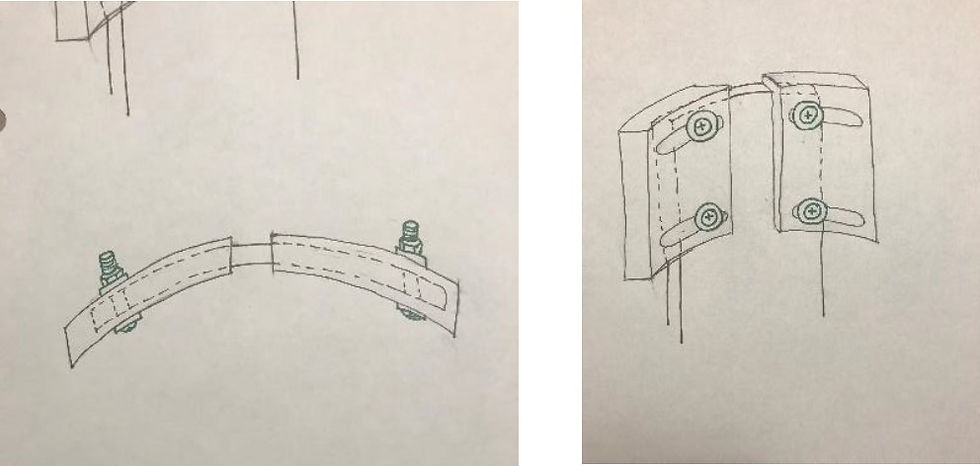
In the end, my team and I decided that in the scope of the class, we would figure out an internal extending system that would adapt to the average growth measures of children ages 6-8 years old, and also prioritize comfort & accessibility of the expansion.

During the prototyping process, we communicated often with Prothesia and asked them feedback on how the concepts met their priorities for the project.
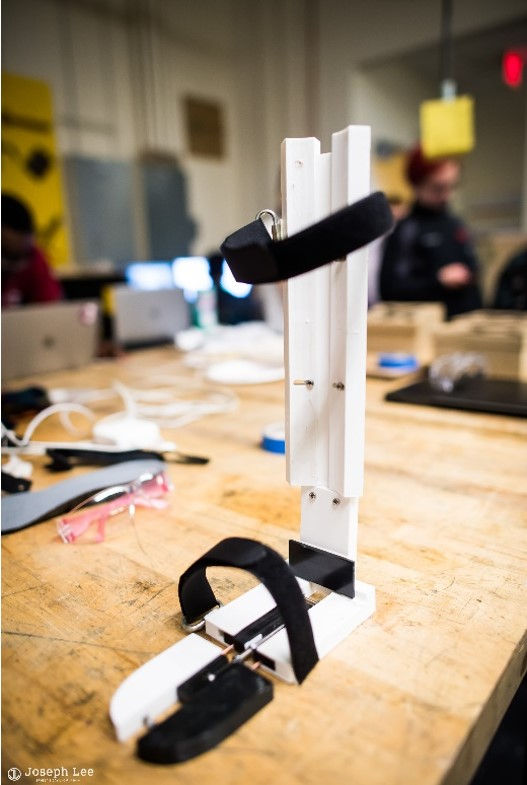
After successfully achieving large 3D-printed pieces with the tolerances we needed for all the moving parts to work together, we presented our findings in front of our D-Lab Design class and share the prototype files with Prothesia.
The system of expansion we had created effectively met our quantitative functional requirements by expanding to the needed lengths and widths.
Qualitatively, the skeleton was meant to be covered by a soft cushion that would help comfort & fit of the child sliding into the orthotic.
A user's manual with more information about assembly & manufacturing can be found here:
In Summary:
This project was my first time working as part of a large team to design for a socially impactful product. To create the ultimate design, we became inspired by the function of an expanding metal retainer and integrated that twisting mechanism into a full-body 3D-printed model. Iterations of foam, wood, and 3D-printed models culminated into a successful presentation and prototype.
While D-Lab Design served as great introduction to the medical device design process, getting there felt haphazard because my team and I did not hold a shared idea of what our scope & vision was from the beginning. I am taking this lesson with me into future design work.
I feel grateful for the opportunity to collaborate with Prothesia, which always served as a source of inspiration for how technology serves to empower families. https://www.prothesia.com/
Comments